A friend bought some of these from Amazon. I figured out how to flash custom firmware and thought I’d share. It’s similar to a Sonoff switch, but there are some important differences.


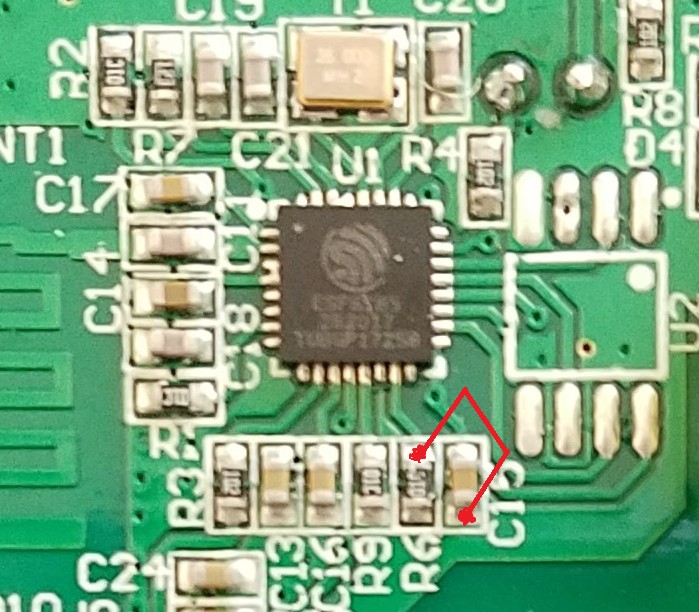
It has a a row of vias/holes for a 4 pin header (top left of middle picture above) like the Sonoff and the ESP-201 boards. You can flash the chip through that header, but compared to the Sonoff and the ESP-201 boards, the TX and RX are reversed on this board! I flashed with the Arduino software, setting the board to ‘generic ESP8285 board’, and I selected ‘1M (64K SPIFFS)’. The switch can be flashed by powering it with 3.3V through the 4 pin connector – disconnect the 120V before doing this. As with all ESP chips, GPIO 0 has to be held low when powering up, to go into flash mode. I did this by using fine tweezers to short the top half of R6 to the bottom half of C15 like this:
So then, the blue WIFI led is controlled by GPIO 13. The LED is on when the IO is LOW.
The relay and the bulb LED are controlled by GPIO 12 – they are on when IO is HIGH.
The capacitive touch switch is connected to GPIO 0 and the IO goes low when touched.
Good luck!
There more discussion about hacking these switches here: https://community.smartthings.com/t/lyasi-wifi-wall-switches-sonoff-plus-ewelink-cloud/
